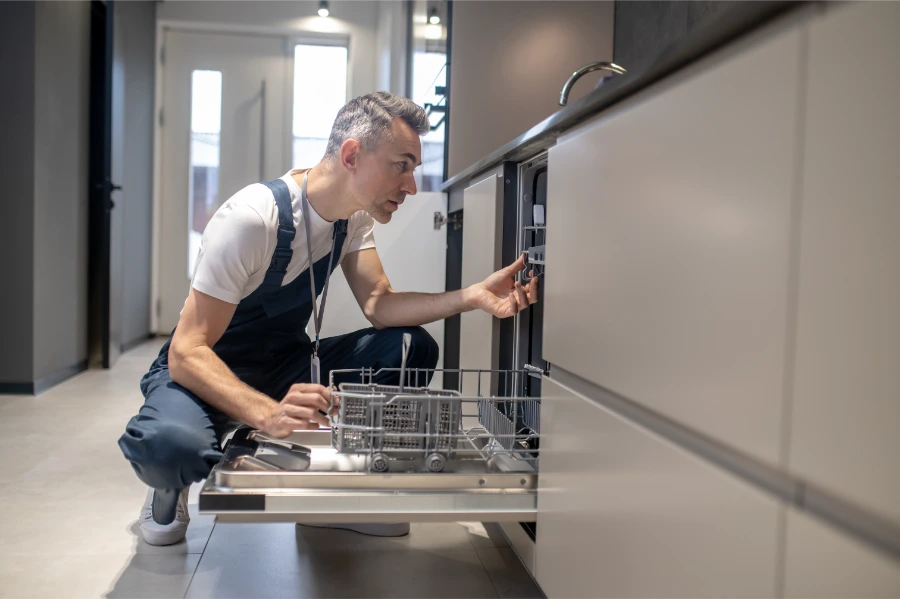
Dishwasher Repair Concord
Standing water, poor cleaning, leaking, or won’t start? We diagnose and repair dishwashers the same day across Cabarrus County — all brands, including Bosch, LG, and Samsung. Your $85 diagnostic applies to the repair.
Understanding the Wash and Drain System Changes How We Diagnose It
Most dishwasher problems — standing water, poor cleaning, leaking — trace back to one of three subsystems: water delivery, circulation, or drainage. Knowing how they interact is what separates a fast, accurate diagnosis from a parts-swapping guessing game.
The fill cycle: At the start of a wash cycle, the control board opens the water inlet valve — a solenoid-operated valve on the lower left side of the unit — to let household water into the sump at the bottom of the tub. A float switch monitors water level and signals the control board to close the inlet valve once the correct level is reached. If the float gets stuck in the up position, it signals “full” and the dishwasher never fills. If the inlet valve solenoid fails, no water enters regardless of the float signal.
The wash cycle — circulation pump and spray arms: Once water is in the sump, the circulation pump motor drives water at high pressure up through the spray arms. Most dishwashers have two spray arms (lower and upper) and a distribution tube that feeds the third, topmost arm in three-rack models. Each spray arm has small holes sized to produce the pressure needed to dislodge food from dishes. The arms rotate from the reaction force of the water jets. If water pressure drops because a hole is clogged, flow is reduced through the whole arm, and rotation slows or stops. The coarse filter and fine filter sit in the sump beneath the lower spray arm — they catch food debris before it re-enters the pump. A clogged filter dramatically reduces circulation and is the most overlooked cause of poor cleaning.
The chopper blade and wash impeller: Many dishwashers incorporate a chopper blade beneath the filter assembly. As water recirculates through the sump, the chopper blade shreds debris small enough to pass through the filter without clogging it. A damaged chopper blade — broken, worn, or jammed with a piece of glass or utensil fragment — can allow larger debris to recirculate against the wash impeller, reducing cleaning performance and producing a grinding noise. Inspecting and cleaning the chopper blade assembly is part of any thorough drain and circulation diagnostic.
The drain cycle — drain pump and drain hose: At the end of each wash or rinse phase, the control board activates the drain pump. The drain pump pushes water through the drain hose and out of the unit, typically to the garbage disposal inlet or air gap beneath the sink. The drain hose must be looped at least 20 inches above the floor (the high loop) or pass through an air gap to prevent backflow from the sink drain into the dishwasher. A check valve or check ball at the drain pump outlet prevents water from flowing back into the tub between cycles. If the check valve or check ball is degraded, water can siphon back into the sump after the drain cycle completes, leaving an inch or two of standing water — not because the drain pump failed, but because water returned after pumping.
The heating element and thermostat: A metal heating element at the bottom of the tub heats water to the temperature needed for the wash cycle and powers the heated dry function. A high-limit thermostat monitors element temperature to prevent overheating. On modern dishwashers, the control board manages element power based on thermistor readings. A failed heating element produces warm but not hot water, extended cycle times, poor cleaning, and dishes that come out wet. The element can be tested with a multimeter — a good element reads 15–30 ohms; an open circuit means it has burned out.
Is Your Dishwasher Doing Any of These?
These are the dishwasher problems we diagnose most often across Concord, Harrisburg, and Kannapolis. Each symptom points to a specific set of likely causes — we track the fault chain from symptom to component to repair decision.
Symptom → Cause → Test → Repair Decision
This is how a dishwasher technician thinks through a diagnosis — and why following the fault chain matters for getting the right repair, not just the most visible one.
Why is my dishwasher not draining — there’s water standing in the bottom?
Standing water at the end of a cycle points to a drain system problem. The diagnostic sequence starts with the easiest checks and works toward the pump. In most cases, the problem is found before you ever reach the drain pump motor itself.
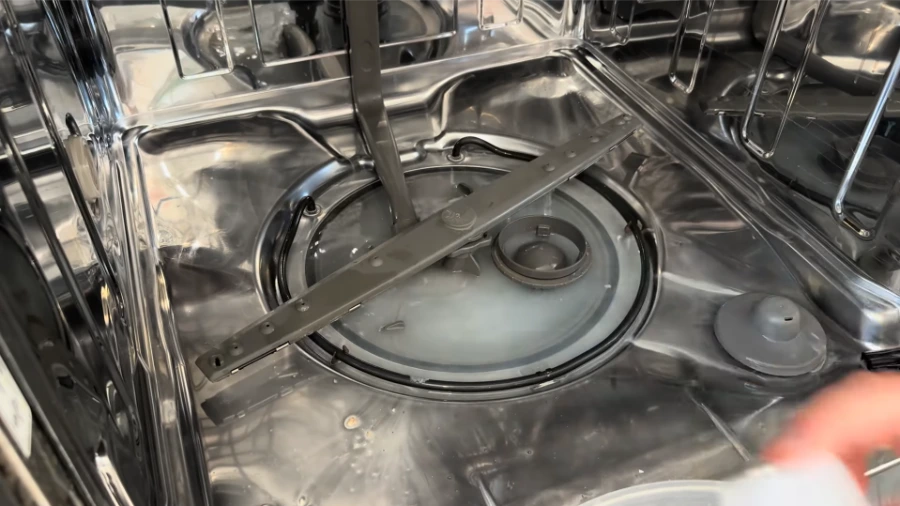
Step 1 — Check the filter assembly. Remove the lower rack. The filter assembly sits in the center of the sump, beneath where the lower spray arm was. Most current dishwashers have a two-part filter: a cylindrical coarse filter (mesh tube) and a flat fine filter plate beneath it. The coarse filter twists out; the fine filter lifts away. If these are clogged with accumulated food debris, they can restrict drain flow enough to leave an inch or two of water — even with a fully functional drain pump. Clean both under running water with a soft brush. This is a homeowner-serviceable item that should be checked monthly in households that run the dishwasher daily.
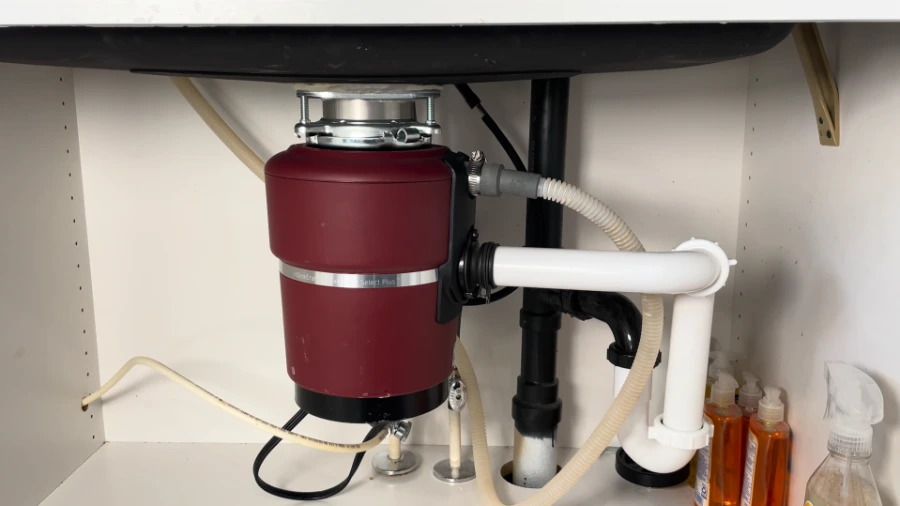
Step 2 — Check the garbage disposal connection. If your dishwasher drain hose connects to a garbage disposal inlet, verify the knockout plug inside the disposal was removed when the disposal was installed. This is a very common oversight on new disposals — the drain hose connects but nothing can pass through because the factory knockout is still in place. Also run the disposal briefly before starting the dishwasher to ensure it’s clear. A backed-up disposal prevents the dishwasher from draining regardless of how well the pump is functioning.
Step 3 — Check the drain pump impeller. If the filters are clean and the disposal connection is clear, access the sump area and inspect the drain pump impeller for debris. Small bones, glass fragments, toothpicks, and fruit pits are common culprits that jam the impeller without blocking it completely. The impeller may still turn slightly while jammed, which is why the drain pump sounds like it’s running (audible hum) without moving enough water to fully clear the sump. On most dishwashers, the drain pump is accessed from the base of the unit after removing the lower front panel.
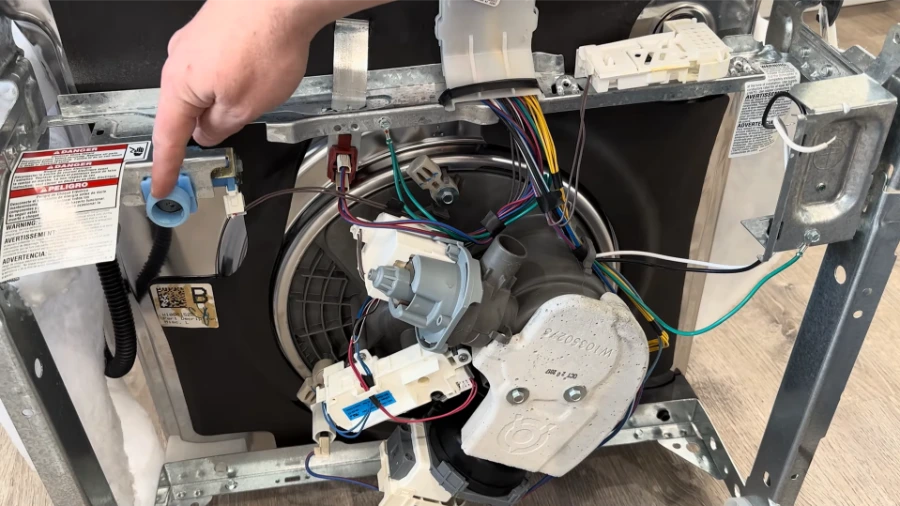
Step 4 — Inspect and test the drain pump motor. If the impeller is clear but still not draining, the drain pump motor may have failed. A working drain pump is audible during the drain phase as a distinct higher-pitched hum (distinct from the lower-pitched wash motor hum). No sound at all during drain indicates either no power to the pump, or a seized motor. A multimeter check for continuity across the pump motor windings confirms whether the motor has an open circuit. A failed drain pump motor is the most common single-component drain failure requiring professional repair.
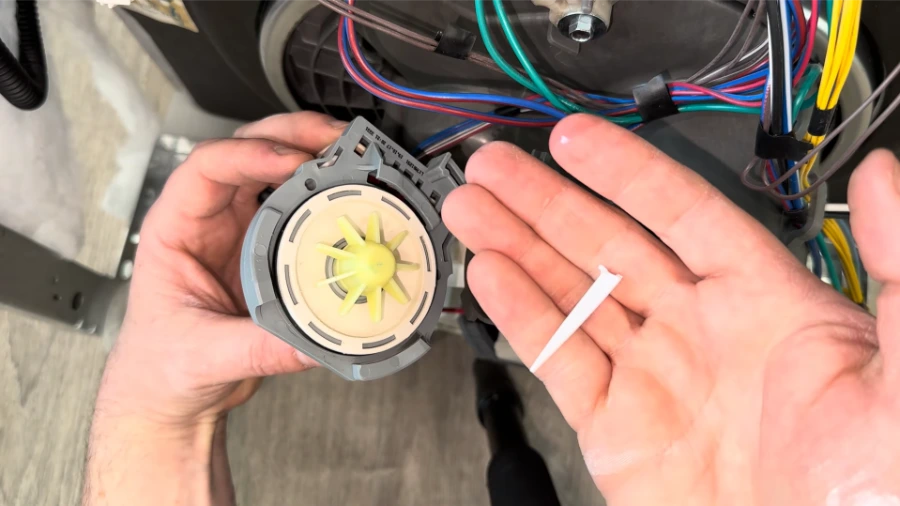
Standing Water After Every Cycle — Pump Audible But Not Draining
Symptom: Dishwasher runs the full cycle but finishes with water standing in the bottom of the tub. Drain pump can be heard humming during the drain phase.
Inspection Step 1: Filter assembly removed — found severely clogged with accumulated food debris. Cleaned thoroughly. Ran a drain-only test. Still standing water.
Inspection Step 2: Drain hose inspected at garbage disposal connection — clear, no knockout plug obstruction, disposal runs free.
Inspection Step 3: Drain pump accessed from base of unit. Impeller housing opened. Found a small piece of broken glass lodged between the impeller vane and housing wall. Impeller could rotate but with very restricted movement. Debris cleared.
Result: After clearing the impeller, drain cycle completed fully. Drain pump motor intact. No parts replacement required beyond the service call.
Why aren’t my dishes coming out clean — they feel gritty and food is still stuck on?
Gritty dishes and food residue after a full wash cycle point almost always to reduced water pressure reaching the dishes. The two most common causes are clogged spray arm holes and a dirty filter assembly reducing recirculation. Both are checked before anything else.
Remove the lower spray arm (it typically lifts straight up from the center post or unscrews counterclockwise) and hold it up to a light. Look through the spray holes along the arm. On a clean spray arm every hole should show daylight through it clearly. Hard water mineral deposits, grease buildup, and small food particles can partially or fully block these holes. Use a toothpick or wooden skewer to clear each blocked hole; rinse under running water and reinstall. Repeat for the upper spray arm (usually a clip-in or quarter-turn on the water distribution tube).
Also verify the spray arm can spin freely. Put the lower rack back in the machine and manually rotate the lower spray arm all the way around. It should clear the rack and any loaded dishes completely. A tall pot or pan in the lower rack that the spray arm hits on each rotation turns the arm into a fixed nozzle pointing in only one direction — a common and easily corrected loading problem.
If spray arm holes are clear and the filter assembly is clean, the next suspects are the circulation pump and the water inlet valve. A circulation pump that’s running but weakening produces less pressure at the spray arms; dishes in the far corners of the tub get almost none. A partially-failed inlet valve that throttles water flow into the sump can leave the tub underfilled, reducing how much water the circulation pump has to work with.
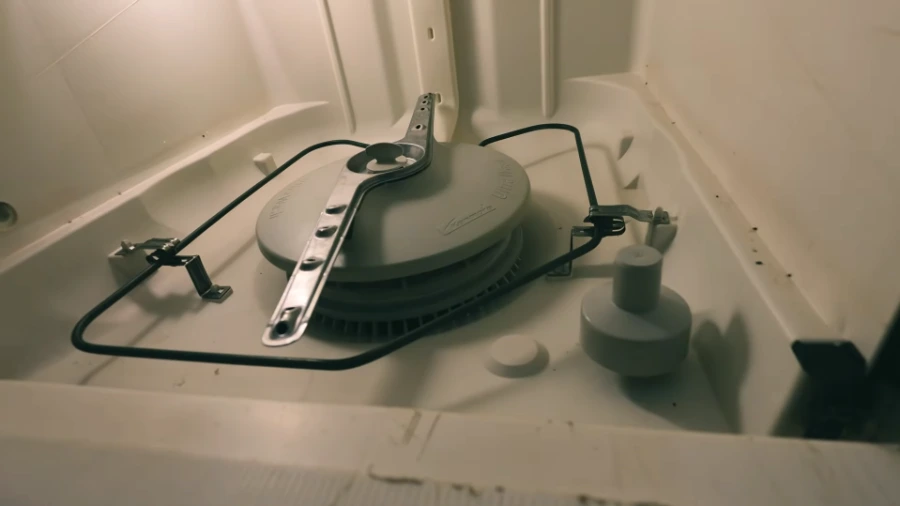
What causes the chopper blade to fail — and how does it affect cleaning?
The chopper blade assembly sits below the filter in the sump and is driven by the circulation pump motor shaft. As water recirculates, the chopper blade shreds food debris before it re-enters the pump and spray arms. A chopper blade that’s worn, chipped, or jammed by a foreign object becomes less effective at shredding debris, allowing larger particles to recirculate against the wash impeller. This produces a grinding noise during the wash cycle and can eventually damage the wash impeller itself if the debris is hard enough.
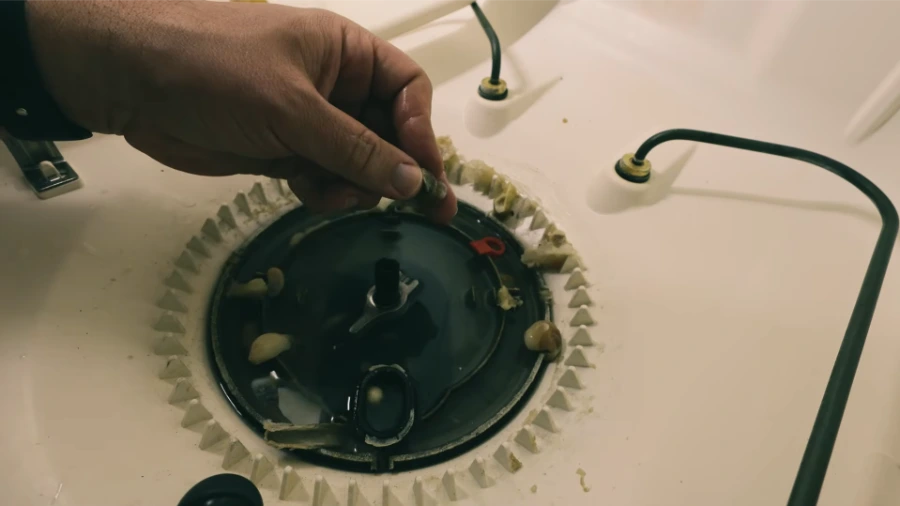
Inspecting the chopper blade requires removing the filter assembly and, on most models, the lower spray arm post. The chopper blade sits on the same shaft as the wash impeller. Look for broken or missing teeth on the blade, for debris jammed under the blade, and for wear on the impeller vanes beneath it. A severely worn chopper blade and wash impeller are typically replaced together as a kit — separate part numbers, but the labor to access them is the same.
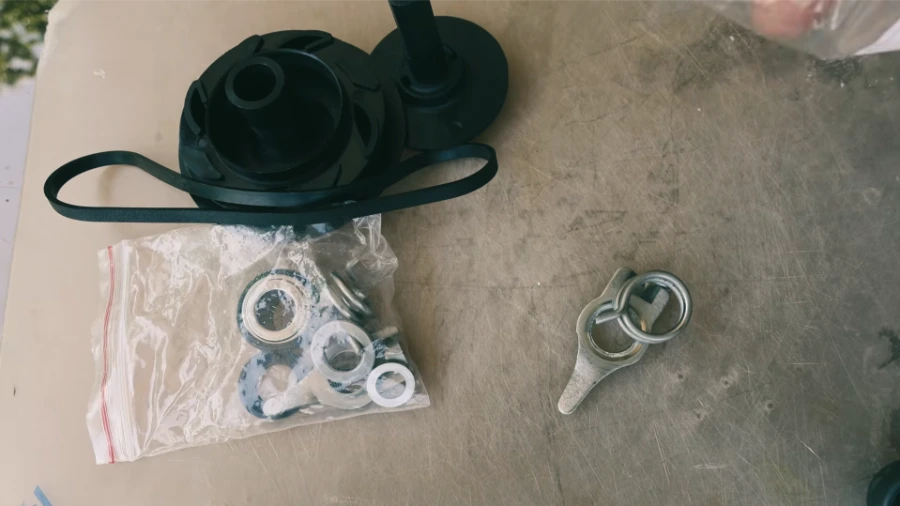
How do you diagnose a dishwasher pump without tearing it apart?
Before disassembling the pump, a few external observations narrow the diagnosis significantly. During the wash phase: listen for the circulation pump hum (a steady, low-pitched motor sound lasting throughout the wash portion of the cycle). During the drain phase: the drain pump sounds distinctly different — higher pitched and briefer, typically 90–120 seconds. If you hear one but not the other, you know which motor is failing. If neither sound is present, the fault is electrical — control board, wiring harness, or thermal fuse — rather than a mechanical pump failure.
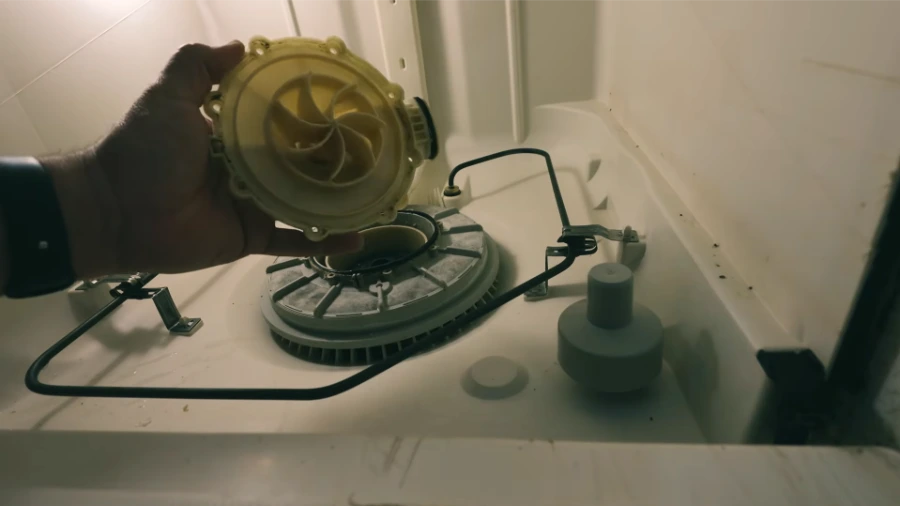
Confirm power delivery to the pump motor using a multimeter in AC voltage mode at the motor connector while the machine is in the relevant phase. Getting line voltage (120V AC in most US installations) but no motor movement confirms a failed motor, not a control issue. No voltage at the connector with a working control board points to a wiring fault or a failed control relay. Continuity testing the motor windings while disconnected verifies whether the motor itself is open-circuit (burned out) or short-circuited.
What causes a dishwasher door gasket to fail — and what does a correct installation look like?
Door gaskets are rubber or silicone seals that run around the perimeter of the tub opening. Over time, they harden, crack, or develop permanent compression set — losing the elasticity needed to form a seal against the door panel. Mineral deposits from hard water can cause the gasket to stiffen prematurely. Repeated slamming can tear the gasket at the corners, where it’s most stressed.
A correct door gasket installation seats the gasket uniformly in the channel around the tub frame with no stretched sections or lifted corners. After installation, the door should close and latch with even resistance around the full perimeter. A simple test: close the door with a piece of paper near the bottom of the gasket, then pull the paper out. You should feel resistance at every point around the door; a spot where the paper slides out freely without resistance is where the seal is failing.
Before Calling: The Paper Test for Door Gasket Leaks
Close the dishwasher door fully with a sheet of paper positioned at the bottom edge of the gasket. Gently pull the paper out. If you feel resistance from the gasket gripping the paper, the seal is good at that point. Move the paper to the sides and top of the door and repeat. Any point where the paper slides out freely without resistance marks a section of gasket that has lost its seal. This localizes the leak before a technician arrives and confirms whether a full gasket replacement or a partial repair is needed.
What to Check Before You Call — and What Requires a Technician
Some dishwasher problems have straightforward homeowner fixes. Knowing which ones can save you a service call. Knowing which ones require a technician keeps you from making the problem worse.
Safe to Check Yourself
Call a Technician For
Dishwasher Problems Specific to Concord, NC Homes
Concord’s water supply is moderate to hard — mineral content is high enough that without regular rinse aid use and periodic filter cleaning, most dishwashers develop mineral buildup problems within two to three years. The coarse and fine filter meshes calcify and reduce water recirculation. Spray arm holes fill with deposits. Heating elements develop scale that insulates them and reduces their effectiveness.
New construction homes in Afton Village, Kellswater Bridge, and Christenbury frequently have garbage disposals installed at the same time as the dishwasher. The single most common dishwasher complaint we see in homes under two years old in Concord is a drain system that was connected correctly but with the disposal knockout still in place — the drain hose connects to the disposal but nothing can pass through it. It presents identically to a failed drain pump until someone checks the disposal inlet.
Bosch dishwashers are particularly common in the higher-end builds near Cabarrus Country Club and in the downtown historic district renovation projects. Bosch units use a condensation drying system rather than a heating element, which changes the diagnosis on “dishes aren’t dry” complaints significantly — Bosch dishes are not intended to come out bone dry without rinse aid and a plastic-items-aren’t-dry caveat built into the design.
All Dishwasher Brands Serviced in Concord, NC
Every major residential brand and configuration — built-in, portable, drawer-style. Bosch, Whirlpool, and GE are the most common brands we work on across Cabarrus County, with LG and Samsung growing in the newer Concord neighborhoods.
We also service refrigerators, washing machines, dryers, and ovens and ranges in Concord, NC — same same-day commitment across Cabarrus County.
What Does Dishwasher Repair Actually Cost in Concord, NC?
Honest numbers based on current Concord market rates. Most dishwasher repairs run $150–$350 for parts and labor.
Should You Fix Your Dishwasher or Buy a New One?
Most dishwasher repairs are worth doing — dishwashers are simpler machines than refrigerators, and the most common failure points (drain pump, inlet valve, door gasket, detergent dispenser) cost a fraction of replacement. But there are exceptions.
| Dishwasher Age | Repair Cost Threshold | Our Typical Recommendation |
|---|---|---|
| Under 6 years | Up to $300–$350 | Almost always worth repairing |
| 6–10 years | Up to $200–$250 | Most common repairs still worth it |
| 10–13 years | Under $150 | Depends on specific repair and brand |
| 13+ years | Filter/spray arm only | Usually replacement makes more sense |
Brand matters on older units. A 10-year-old Bosch or Miele is worth repairing for most failure types. A 10-year-old entry-level unit with a failed pump motor and a broken door latch simultaneously — probably not. A new mid-range dishwasher costs $600–$1,000 installed. We give you the honest number and the honest recommendation before you commit.
When is a dishwasher not worth repairing?
The repair-vs.-replace calculation tips toward replacement when the unit is more than 12 years old and the repair involves the main pump motor, a control board, or both simultaneously. At that age, other components are also near end-of-life, and a $250 pump repair today often precedes a $200 control board failure six months later. We’ll flag this pattern and give you an honest recommendation rather than pushing a repair that won’t extend the useful life of the unit by more than a year or two.
What to Expect When You Call
From the first call to running dishes again — here’s the process.
Dishwasher Repair Across Concord and Cabarrus County
Whether you’re in a newer build in Kellswater Bridge or an established home near Historic Downtown Concord, we serve your area with same-day availability Monday through Saturday.
Dishwasher Repair Questions — Answered
Dishwasher Not Working? Call Now.
Same-day appliance repair in Concord across Harrisburg, Kannapolis, and all of Cabarrus County. We answer live — no voicemail queues, no online-only booking.