Dryer Repair in Concord, NC
Won’t start? No heat? Squealing through the spin cycle? We diagnose and repair residential dryers throughout Cabarrus County — same day in most cases. All major brands, including Samsung and LG.
What Most Dryer Problems Actually Come Down To
Most residential dryer failures involve one specific failed component — not the entire machine. The challenge is identifying which one before replacing parts. Replacing a heating element when the real problem is a blocked vent, for example, means the new element will fail again for exactly the same reason.
A useful first step is sorting the symptom into one of three categories: the dryer won’t run at all; the dryer runs but won’t heat; or the dryer runs and heats but isn’t drying clothes effectively. Each category points toward a different group of components, and a technician uses that distinction to narrow the diagnosis before opening the machine.
The sections below cover the most common dryer failures we encounter in Concord homes, what causes them, and how diagnosis actually works — not just a list of parts.
Where to start before calling
Check that the breaker hasn’t tripped. Electric dryers use a double-pole breaker — one leg can trip without the other, which leaves the dryer able to run but unable to heat. If the dryer tumbles normally with no heat, go check the breaker panel before anything else.
Dryer Won’t Start, or the Drum Has Stopped Turning
A dryer that won’t start at all is a different situation from one that starts, hums, but won’t tumble. The distinction matters for diagnosis.
Dryer Won’t Start at All
If pressing start does nothing, the first component to check is the door switch. The dryer will not start unless it detects a closed door, and the door switch is the component that communicates that. On many dryers the switch is audible — a working door switch clicks when you press it by hand. A silent switch is a strong indicator of failure.
A tripped thermal fuse can also prevent the dryer from starting entirely. This is a one-time safety device that opens permanently when the dryer overheats. Once it trips, the machine is dead — and replacing it without finding and fixing the root cause (almost always a blocked vent or lint buildup) means it will trip again.
Drum Turns But Stops, or Won’t Turn at All
If the dryer runs but the drum isn’t moving, a broken drive belt is the most likely cause. The belt wraps around the drum, around the idler pulley, and onto the motor shaft. When it breaks, the motor still runs — you may hear it humming — but nothing turns. On many dryers a broken belt also triggers a safety switch that shuts the machine off entirely.
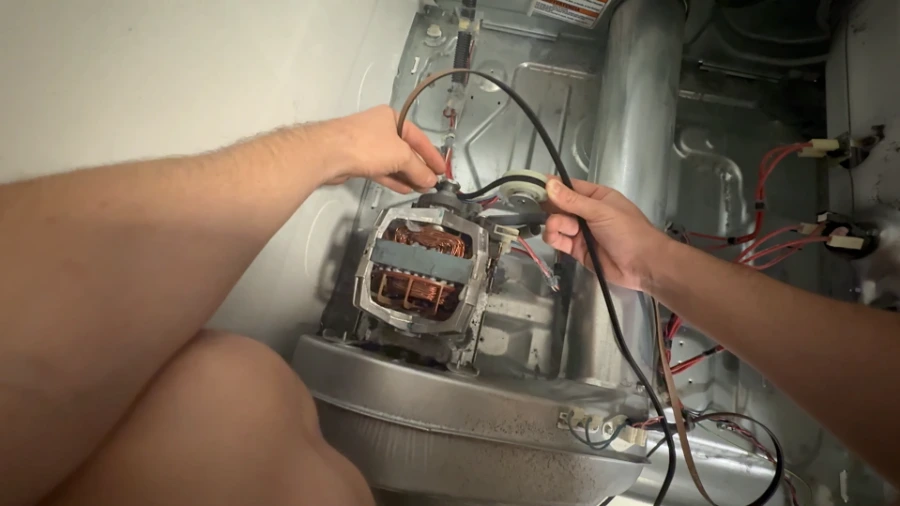
A seized or badly worn motor can also stop the drum. The difference: a bad motor usually trips a reset or thermal overload inside the motor housing after running for a few minutes, whereas a broken belt stops the drum immediately. A technician checks both when the drum won’t turn.
Dryer Making Noise: Squealing, Grinding, or Thumping
Unusual sounds from a dryer are almost always mechanical, and the sound itself is diagnostic. A loud, consistent squeal during operation points toward something different than an intermittent thump every few seconds.
Why do most people assume the belt when a dryer squeals?
Homeowners often point to the belt first because it’s the most visible moving part. But in most cases, squealing or squeaking during operation is actually the idler pulley — specifically its internal bearing wearing out or seizing. The belt itself almost never squeals; it either works or it breaks.
The Idler Pulley: Most Common Cause of Dryer Squealing
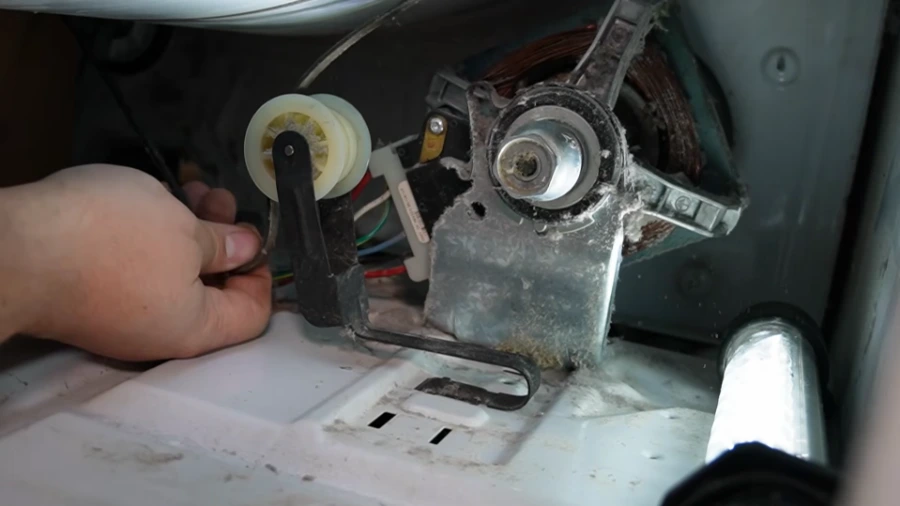
The idler pulley maintains tension on the drive belt throughout every cycle. It sits on a spring-loaded arm and spins continuously while the drum turns. When its internal bearing wears down or becomes contaminated with lint, the pulley starts to drag instead of spin freely — producing the squealing or grinding sound homeowners describe.
A simple test: with the dryer unplugged, try spinning the pulley by hand. A good idler pulley spins easily and smoothly with minimal resistance. A failing one will turn stiffly, feel rough, or barely move at all. At that stage replacement is the right call.
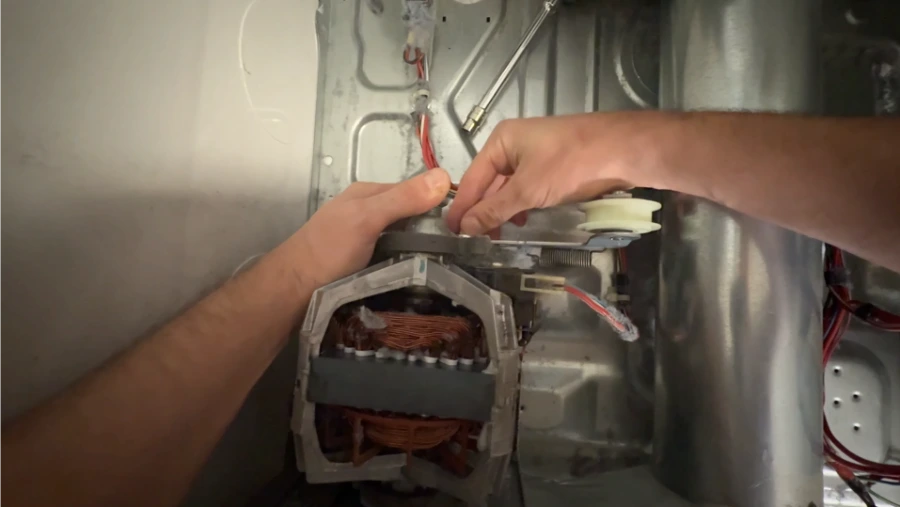
It’s also worth noting that heavy lint buildup inside the dryer can accelerate pulley bearing failure. Lint acts as an abrasive and can work into the bearing housing over time. When a pulley fails on a relatively new machine, checking for lint accumulation around the motor and pulley area is part of the diagnosis — and cleaning it out prevents recurrence.
Roller Wheels: The Cause of Thumping
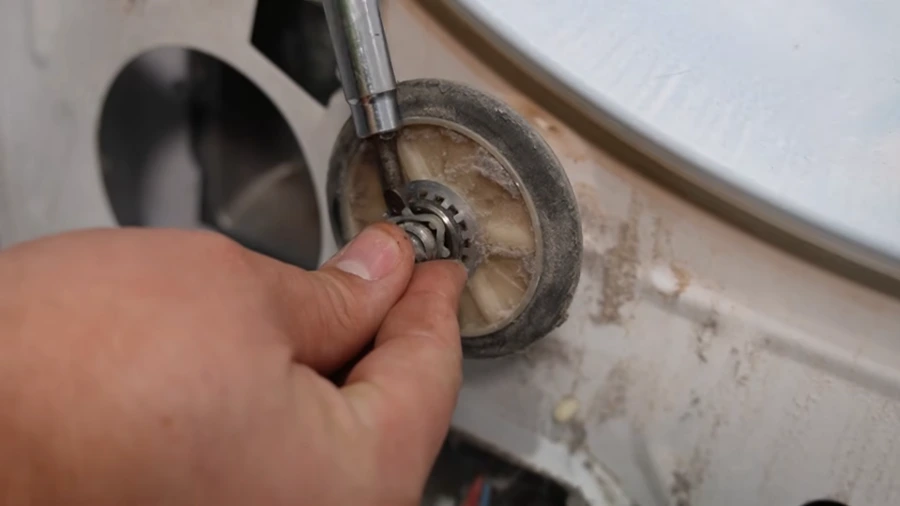
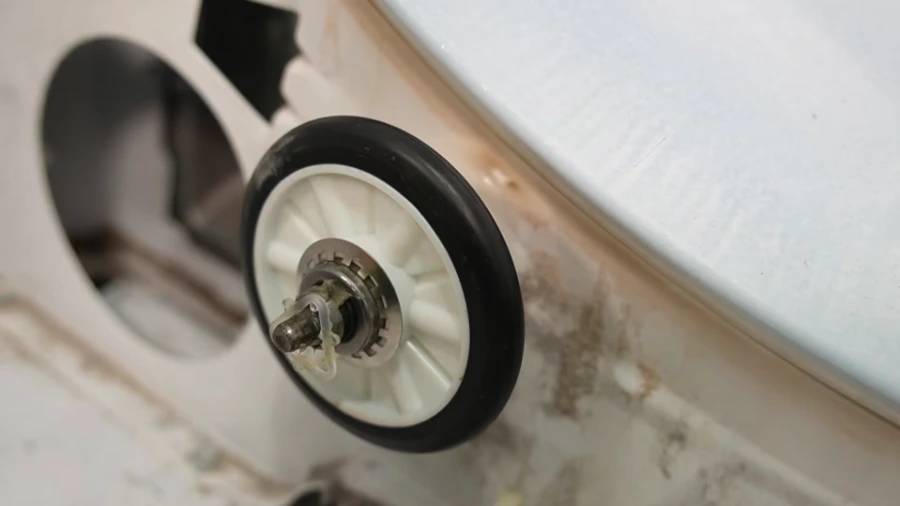
Drum support roller wheels carry the weight of the drum as it rotates. There are typically two at the rear of the drum, and some models have additional rollers at the front. When a roller wheel wears out, develops flat spots, or seizes up, it produces a repeating thump — once per drum rotation — as the drum rolls over the damaged section.
A seized roller that doesn’t spin at all is immediately obvious: the drum slides over it rather than rolling, generating both noise and uneven wear. Pet hair and lint accumulating on the roller shaft is a common cause of this — it winds around the axle and eventually locks the roller in place. When replacing rollers, the shaft itself should be cleaned and inspected before the new wheel goes on.
Dryer Has No Heat, or Heats But Takes Too Long to Dry
These two problems look similar from the outside but have different causes. A dryer that produces no heat at all is almost always an electrical or component failure. A dryer that heats but leaves clothes damp after a full cycle usually has an airflow problem.
When the Dryer Produces No Heat at All
After confirming the breaker is fine, a technician working on a no-heat electric dryer checks four main components: the thermal fuse, the thermostat, the thermistor, and the heating element itself. Each can be tested with a multimeter and each fails in a predictable way.
Why does replacing just the thermal fuse usually fail to solve the problem?
The thermal fuse is a one-time safety device. When it blows, it means the dryer overheated. Replacing the fuse without addressing why it overheated — almost always a blocked exhaust vent or lint-packed interior — means the new fuse will blow again under exactly the same conditions. The fuse is a symptom, not the root cause. When a technician replaces a blown thermal fuse, clearing the vent path and cleaning the interior is part of the same job.
The thermostat is worth paying attention to even when it tests fine on a multimeter. A thermostat that has weakened internally can pass a continuity test but fail to regulate temperature correctly once the dryer is running at heat, allowing the element to run unchecked until the thermal fuse trips. For this reason, when a thermal fuse is found blown, the thermostat is typically replaced at the same time rather than waiting for it to cause another fuse failure.
Gas Dryers: The Igniter
On gas dryers, a failed igniter is the most common cause of no heat. The igniter glows to ignite the gas; when it fails, the burner never lights. The igniter is fragile — the ceramic element cracks easily during handling — and must be replaced with care.
When the Dryer Heats But Clothes Stay Damp
If the dryer is producing heat but taking two or three cycles to dry a normal load, the problem is almost certainly airflow. The exhaust vent is the first thing to check: a clogged, kinked, or overly long vent run restricts the path that humid air needs to escape through. The dryer fills with its own humidity and stops drying effectively even though it’s generating heat normally.
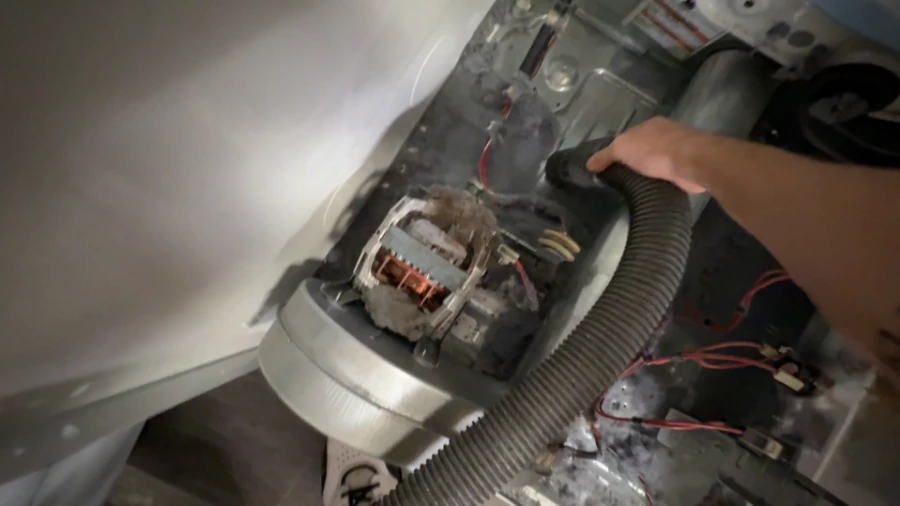
If the vent is clear, the blower wheel is the next suspect. The blower moves air through the drum and out the exhaust. If it’s obstructed by a sock, a coin, or accumulated lint, airflow drops significantly. On some models, an item lodged in the blower housing will also produce a rattling or banging sound during operation. Inspecting the blower housing is part of any thorough no-heat or slow-drying diagnosis.
Accessing the Dryer and What a Technician Inspects
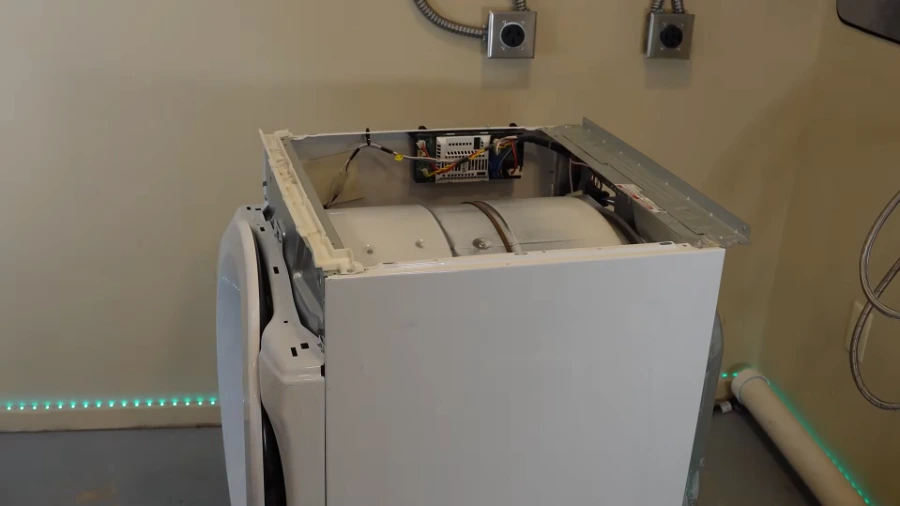
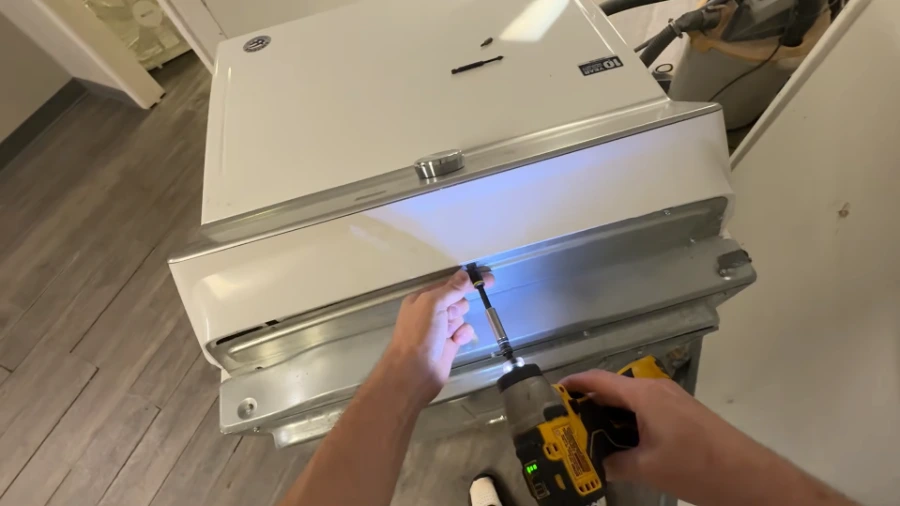
Most residential dryer repairs require removing the front panel or the back panel — sometimes both. The specific access method depends on the model. Front-access dryers require disconnecting the door switch harness and lifting the drum out through the front. Rear-access models allow inspection of the heating assembly and blower housing from the back.
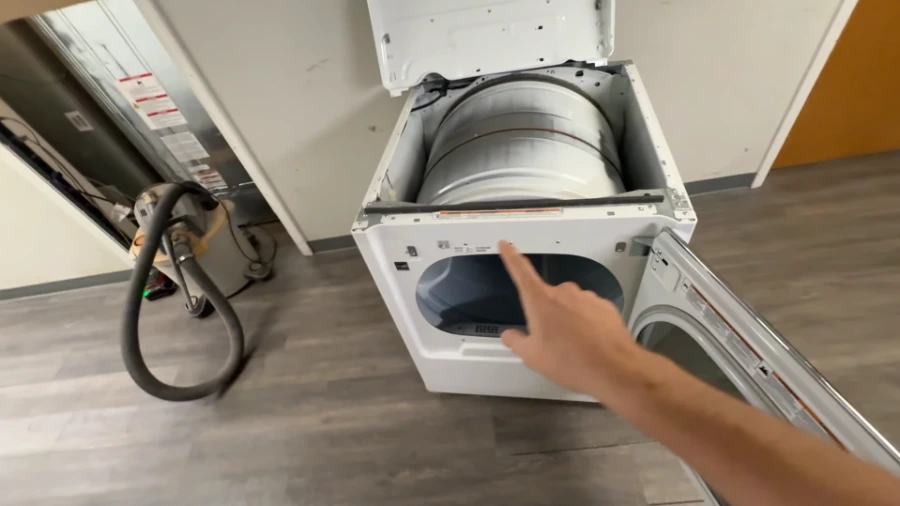
With the drum out, several components become accessible at once: the drive belt, the idler pulley and its spring-loaded arm, both drum support rollers, the motor, the blower housing, and — in many models — the thermal components. A technician will typically inspect all of these before deciding what needs replacing, because multiple components sometimes fail together or one failure causes secondary wear on adjacent parts.
One inspection point often overlooked: the rear drum felt seal. This felt strip runs around the back of the drum and prevents heated air from escaping at the rear. If it wears out or develops gaps, air leaks out rather than passing through the drum — reducing drying efficiency and sometimes causing the rear metal bulkhead to overheat and develop a burn groove. If the bulkhead itself has been damaged by the drum riding against it, the repair scope expands significantly.
After a Belt or Pulley Repair: Verifying the Work
After reassembling the belt and drum, spinning the drum by hand should also turn the blower wheel. That’s the reliable check that the belt is seated correctly on both the motor shaft and the idler pulley. If the drum turns but the blower doesn’t move, the belt needs to be re-routed before the machine is closed up and tested.
Dryer Brands Serviced in Concord
We work on all major residential dryer brands, including models that some local shops decline to service.
We also service washing machines and refrigerators across Cabarrus County — same brands, same same-day service commitment.
Is It Worth Repairing Your Dryer?
The answer depends on what’s broken and how old the machine is. A useful rule of thumb: if the repair cost is less than half the price of a comparable new dryer and the machine is under eight years old, repair typically makes economic sense.
What types of dryer repairs are clearly worth doing?
Belt replacements, idler pulley swaps, roller wheel sets, door switches, and thermal fuses are all relatively low-cost repairs on machines that are otherwise in good working order. These parts are inexpensive and the labor is straightforward. A dryer that was working well before a belt or pulley failure is a good candidate for repair.
Motor replacements and control board failures are the ones to evaluate more carefully. If the machine is already ten or more years old, approaching those repairs means weighing repair cost against a machine that may develop other failures in the near future. A technician can give you that assessment honestly after the diagnostic — schedule a diagnostic and we will tell you when replacement makes more sense.
One thing that affects part availability: some Samsung dryer models have experienced supply chain issues with specific components, particularly control boards. We confirm parts availability before committing you to a repair cost.
Dryer Maintenance That Extends Machine Life
Dryer Repair in Concord and Cabarrus County
We serve Concord, Harrisburg, Kannapolis, and surrounding communities throughout Cabarrus County. Same-day service is available in most cases.
Common Dryer Repair Questions
Schedule Dryer Repair in Concord
Most repairs completed same day. We serve Concord, Harrisburg, Kannapolis, and all of Cabarrus County.